13. HTML Documents in Depth
An HTML document will usually
HTML Doctypes
An HTML document will usually start with a type declaration (which is not a tag, so it should not have a closing tag). The declaration helps the browser determine what type of HTML document it’s trying to parse and display.
If you’ve ever looked at an older website using dev tools, you might have noticed a doctype that looks like this:
<!DOCTYPE HTML PUBLIC "-//W3C//DTD HTML 4.01//EN" "http://www.w3.org/TR/html4/strict.dtd">

(Triggers Standards mode but specifies an older form of validation.)
Or maybe you didn’t see a doctype at all?
<html>
    …
</html>

(Triggers “Quirks” mode. This is bad.)
But newer websites (and your websites!) will have a declaration that looks like this:
<!DOCTYPE html>

(Triggers Standards mode with all updated features.) 😊
Browsers look for this doctype declaration to determine which rendering mode to use to render the site. Generally, newer sites follow standard HTML specifications. The current standard HTML specification is called HTML5 (which is what you're learning!). On the other hand, older sites, created before HTML standards really existed, might use a different rendering mode that imitates the behavior of older browsers.
If you are interested in reading more about doctype declarations and different rendering modes, you can read about them here.
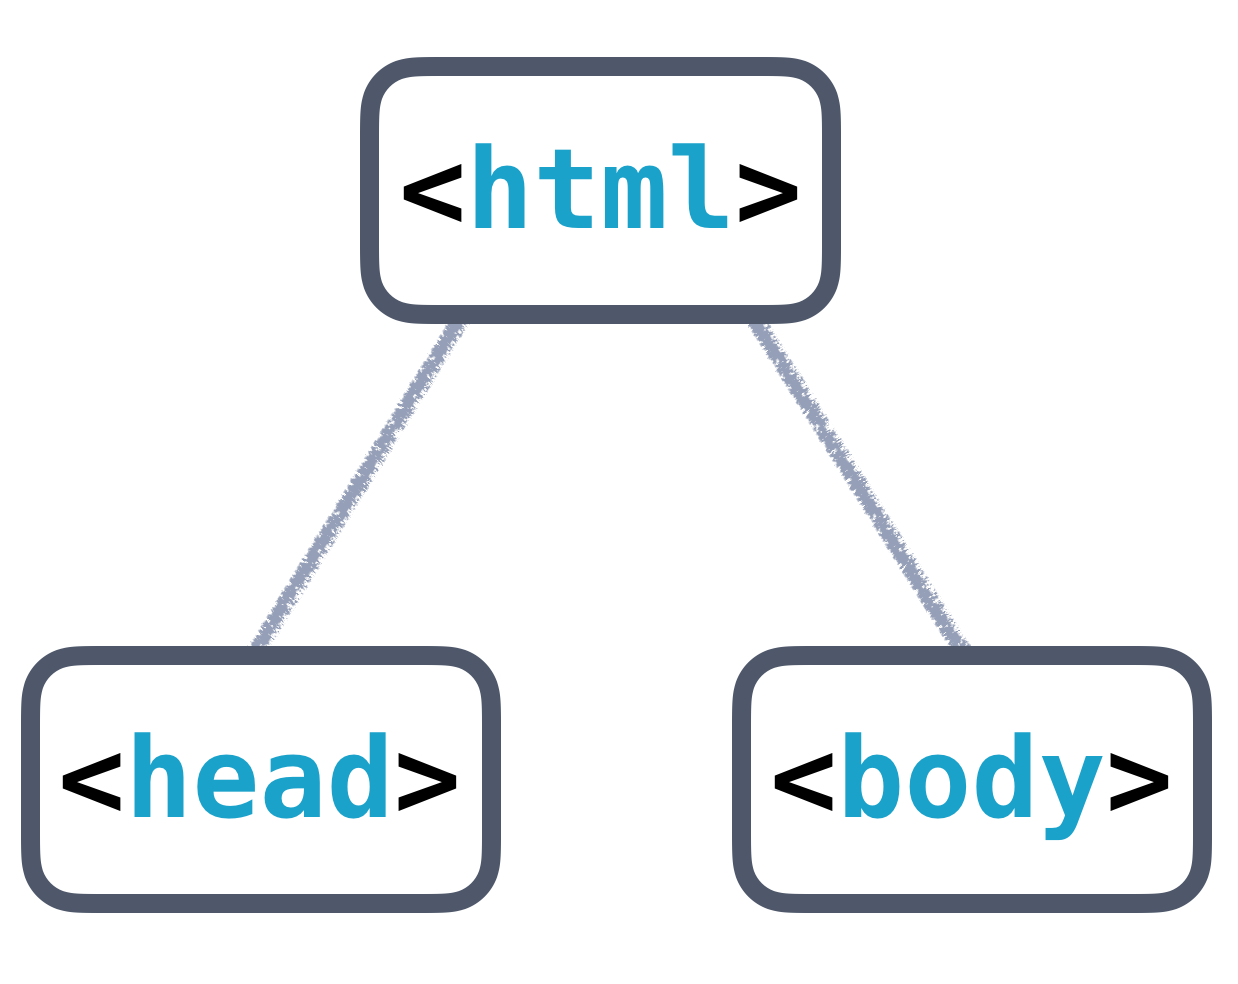
Once you’ve declared the doctype, the next part of your HTML document is the <html> tag, which tells the browser that everything enclosed inside the <html> ... </html> should be parsed as HTML. Then you have the two main sections of your HTML document: <head> and <body>
simple html tree structure

Basic HTML Tree Structure
The <head> will contain general inform
<head> and <body>
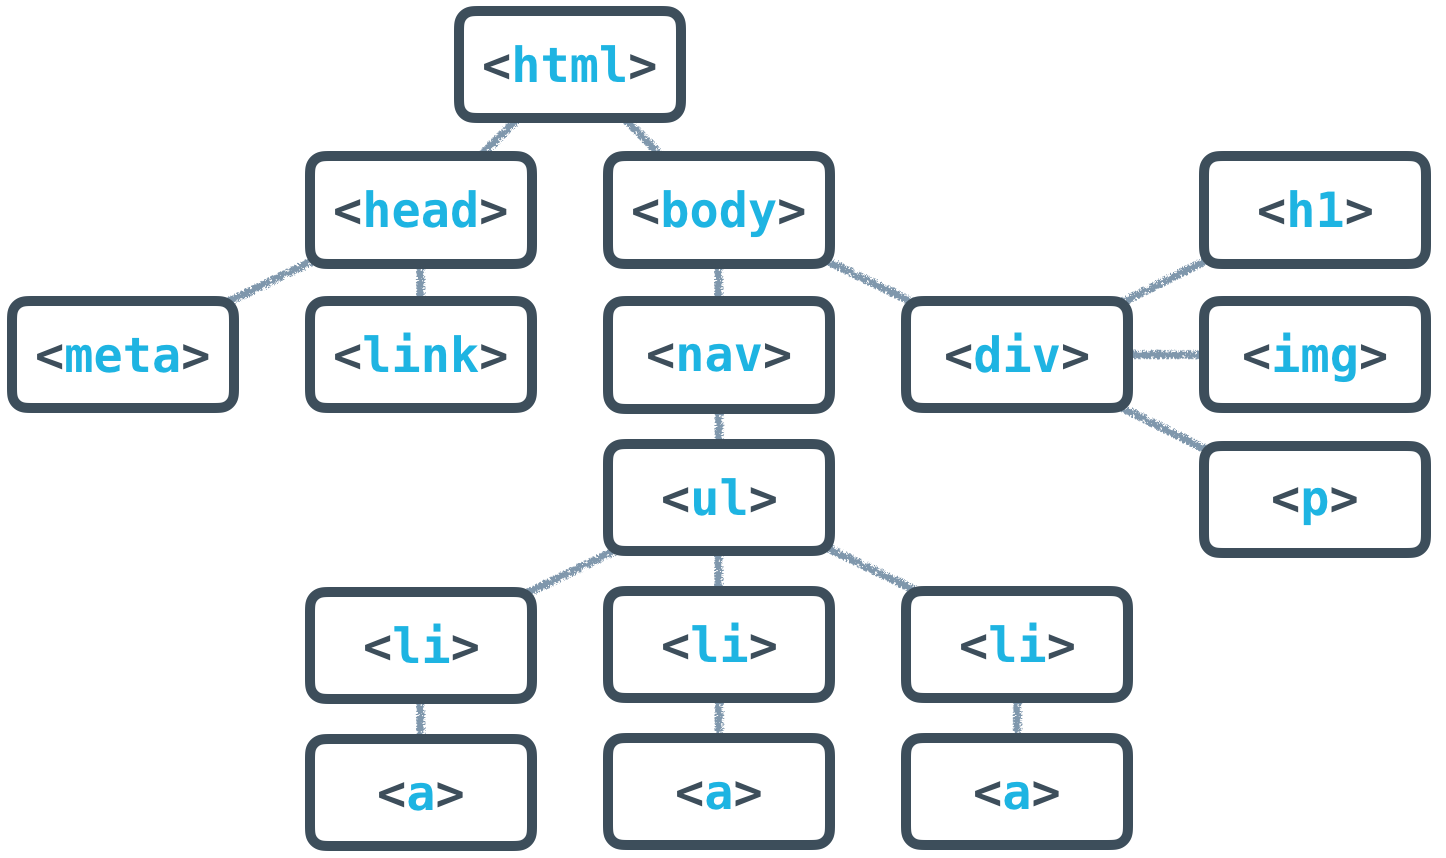
The <head> will contain general information and metadata about the page, while the <body> will contain the content that will be displayed on the page. Here’s an example tree structure for a full HTML document:
full html tree structure

Full HTML Tree Structure
All the basics of HTML syntax that you’ve l
All of the HTML syntax that you’ve learned in this lesson will help you create the content of the page, which is always contained inside the <body> tags. The <body> is always visible.
The <head>, on the other hand, is never visible, but the information in it describes the page and links to other files the browser needs to render the website correctly. For instance, the <head> is responsible for:
- the document’s title (the text that shows up in browser tabs):
<title>About Me</title>. - associated CSS files (for style):
<link rel="stylesheet" type="text/css" href="style.css">. - associated JavaScript files (multipurpose scripts to change rendering and behavior):
<script src="animations.js"></script>. - the charset being used (the text's encoding):
<meta charset="utf-8">. - keywords, authors, and descriptions (often useful for SEO):
<meta name="description" content="This is what my website is all about!">. - … and more!
At this point, just focus on these two tags:
<title>About Me</title><meta charset="utf-8">
<meta charset="utf-8"> is pretty standard, and will allow your website to display any Unicode character. (Read more on how UTF-8 works here.) <title> will define the title of the document and will be displayed in the tab of the browser window when a user visits the page.
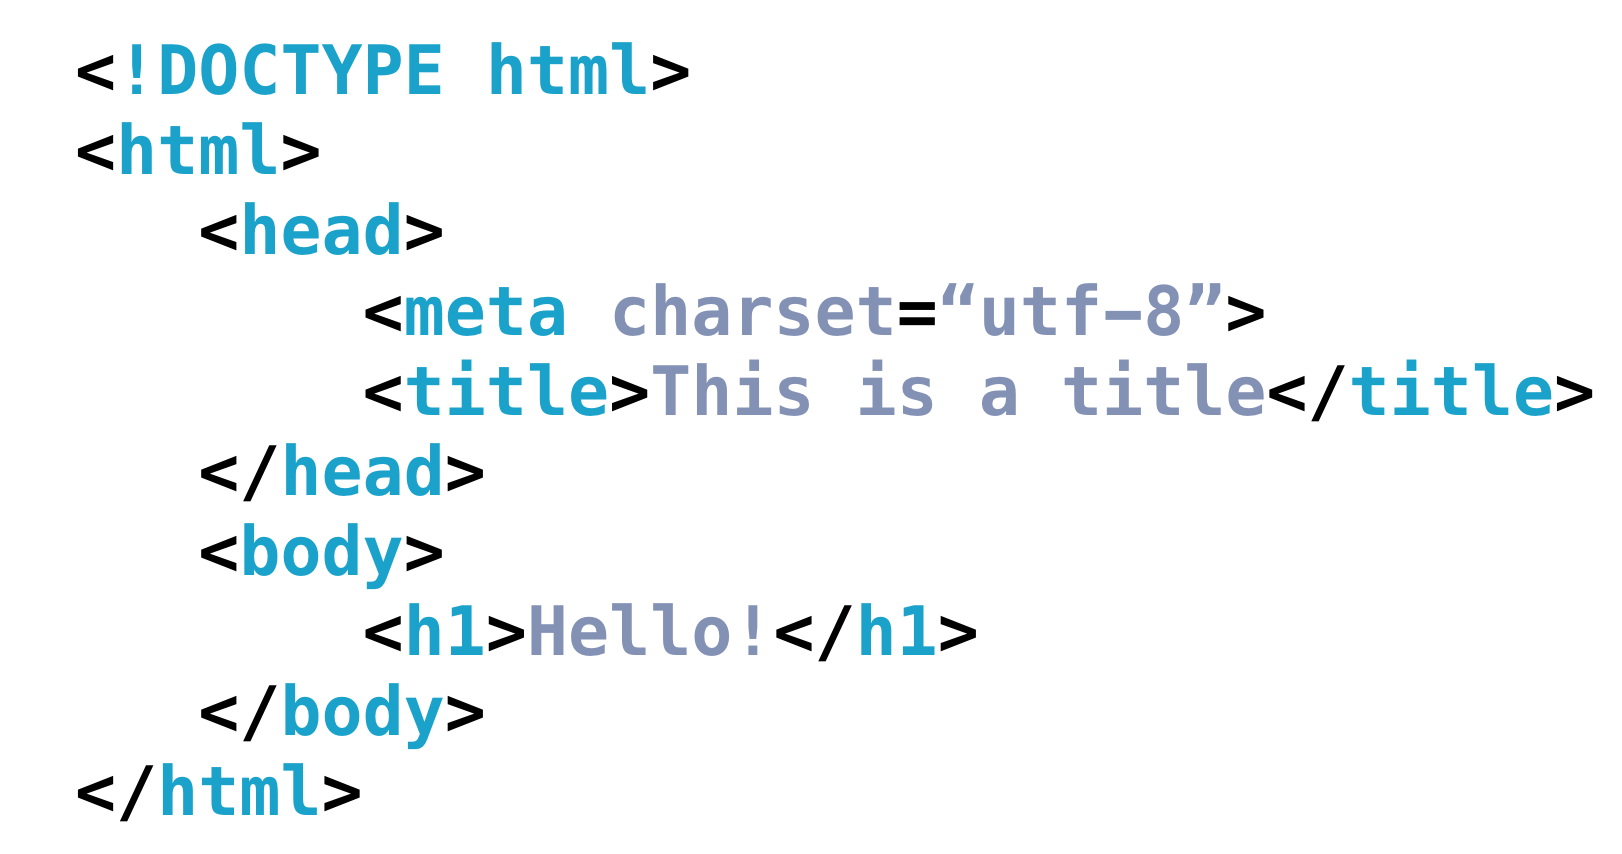
Full HTML Template

Full HTML Template
HTML Validators
HTML Validators
This might seem like a lot to remember, but thankfully, there are tools out there to help you. Much like how the Udacity Feedback Extension tells you when you've met all the requirements for a particular project, HTML validators analyze your website and verify that you're writing valid HTML.
I want you to try one out now!
HTML Validator Quiz
SOLUTION:
- The validator found errors or warnings in the HTML
- The validator assumed the document was something other than HTML5
HTML Validator Part 2 Quiz